MY WATER COOLER IS LEAKING
FLOAT VALUE HOW TO CLEAN
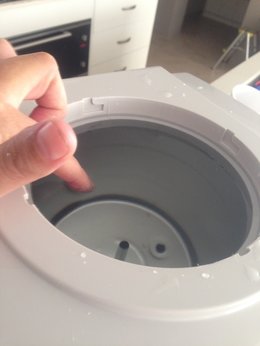
NEEDS TO BE ABOUT
2 - 3 INCHES DOWN
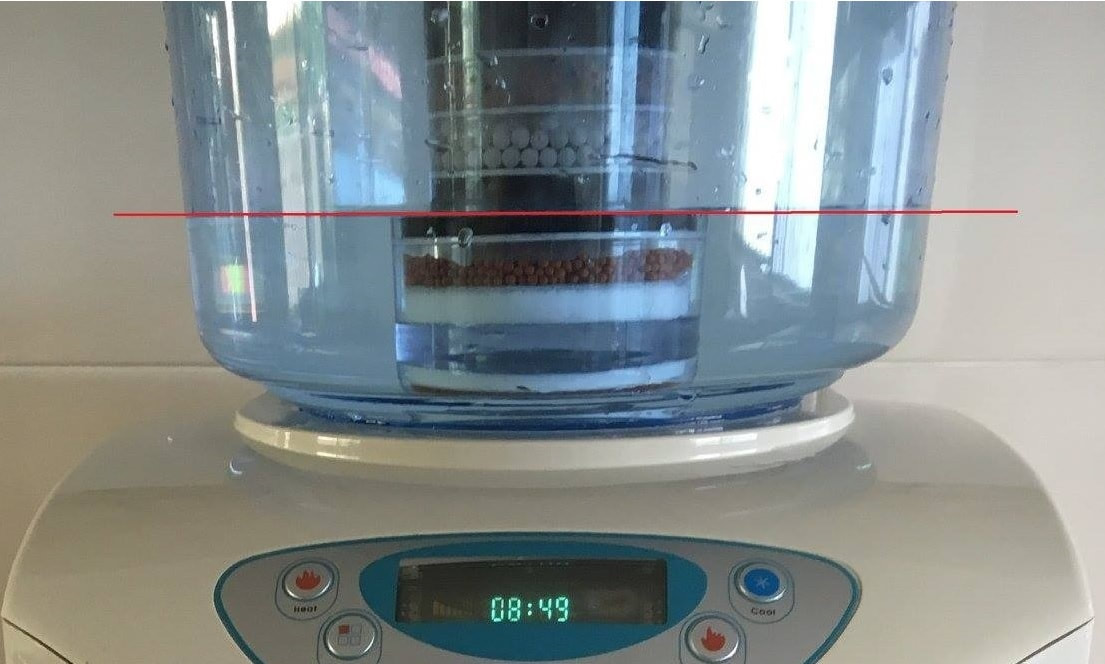
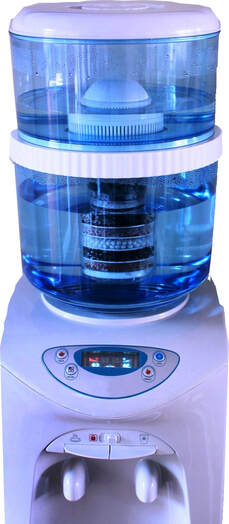
IF HIGHER (AS PICTURED ABOVE)
FLOAT VALUE NEEDS
REPLACING OR CLEANING
EMPTY THE TANK WATER VIA TAPS UNTIL ABOUT 2 - 3 INCHES DOWN
CLEAN FLOAT VALUE
2 - 3 INCHES DOWN
IF HIGHER (AS PICTURED ABOVE)
FLOAT VALUE NEEDS
REPLACING OR CLEANING
EMPTY THE TANK WATER VIA TAPS UNTIL ABOUT 2 - 3 INCHES DOWN
CLEAN FLOAT VALUE
|
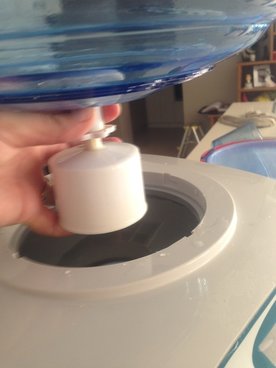
PICTURED ABOVE
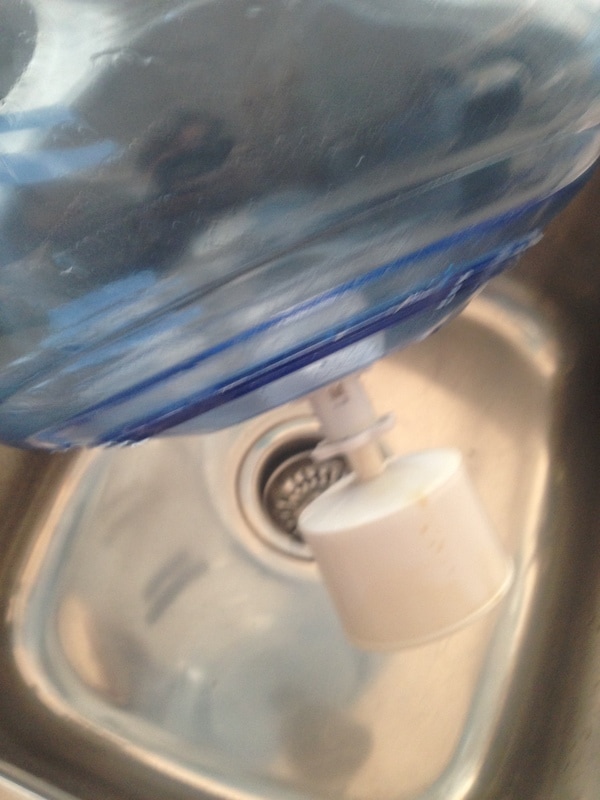
BOTTLED SET LIFTED OFF WATER COOLER WATER LEVEL TOO HIGH. FLOAT VALUE NEEDS TO BE CLEANED THOROUGHLY With a tooth brush. Parts can be taken apart, place in drip tray fill with water (leave about 5 -10 mins) clean every where with a soft toothbrush . In side the thread can be small particles of carbon from the filter Watch water cooler fill up the bottom bottle,
once you can see that the bottom bottle is filling and they is No leaks.. you can have a quick check lift up bottle set for a quick peek, then fill normally. |
STEPS.
1. Lift off bottle set of water cooler. place in bucket etc Water WILL still flow from the float value you can push up float valve to stop water whilst moving. (either discard water OR add back to water cooler once float valve has been cleaned. VERY IMPORTANT, DO NOT MISS THIS STEP. 2. Dispenser water from cold tap till water level in cold tank is about 2 - 3 inches down. 3. unscrew float value place in drip tray fill with water. (leave for 5 - 10 minutes) clean thoroughly with a soft tooth brush, making sure you clean the thread as they may be black small carbon particles in there. 4. Put float value back together making sure all washers are in the correct place. 5. Place back onto water cooler.
6. Either add your saved filtered water to bottom of bottle set. OR place all bottle set back onto water cooler fill bucket ( making sure this IS only used for water) Fill up top bottled set covering the dome to make sure you get NO air locks etc. |
WHY IS MY WATER COOLER LEAKING FROM THE BOTTOM?.
95% OF ALL LEAKS ARE CAUSED BY THE FLOAT VALUE
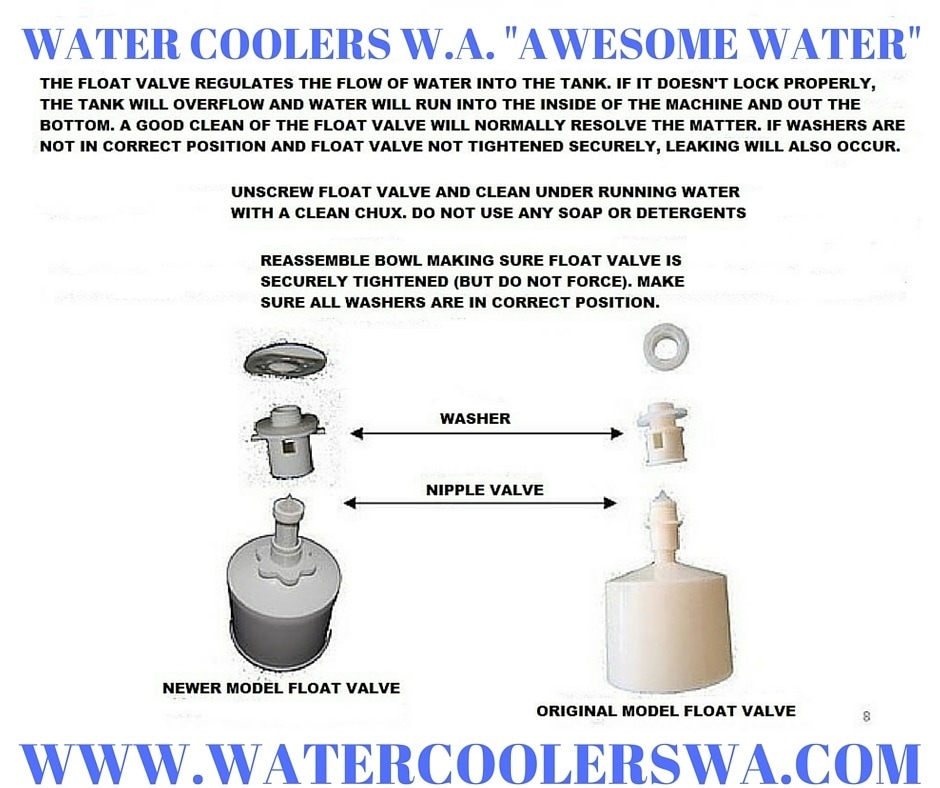
THE FLOAT VALUE REGULATES THE FLOW OF THE WATER INTO THE TANK.
IF IT DOESN'T LOCK PROPERLY?.
THE TANK OVER FLOWS
THERE IS A SMALL GAP WHERE THE WATER SPILLS OVER TO THE INSIDE OF THE MACHINE
THEN RUNS DOWN THE SIDES OUT OF A SMALL HOLE IN THE BOTTOM OF THE MACHINE
THIS HOLE IS DESIGNED TO LET THE WATER THAT OVER FLOWS OUT...
SO THAT IS DOESN'T SIT IN THE BASE OF THE WATER COOLER
WHERE IT CAN CAUSE DAMAGE TO THE ELECTRICAL COMPONENTS ETC
CLEANING THE FLOAT VALUE IS SO IMPORTANT
THAT THIS SHOULD BE DONE EVERY TIME YOU CHANGE YOUR AWESOME WATER FILTER
RECOMMEND EVERY 6 MONTHS
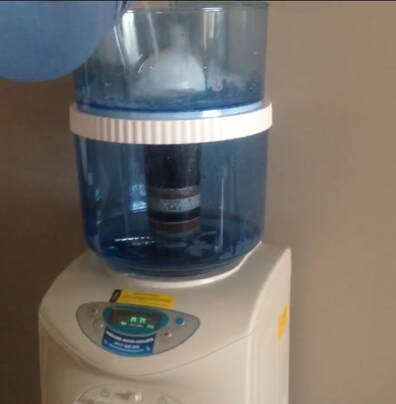
THIS IS TOO FULL AND FLOAT VALUE NOT OPERATING WELL...
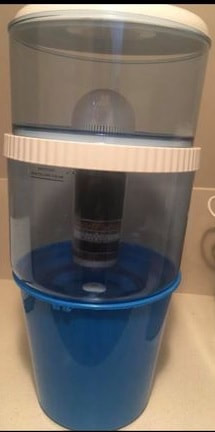
REMOVE BOTTLE SET - SET ASIDE IN A BUCKET
AS IT WILL STILL FLOW WATER THROUGH
EMPTY WATER OUT OF COLD TANK UNTIL WATER LEVEL IS
ABOUT 3 INCHES DOWN
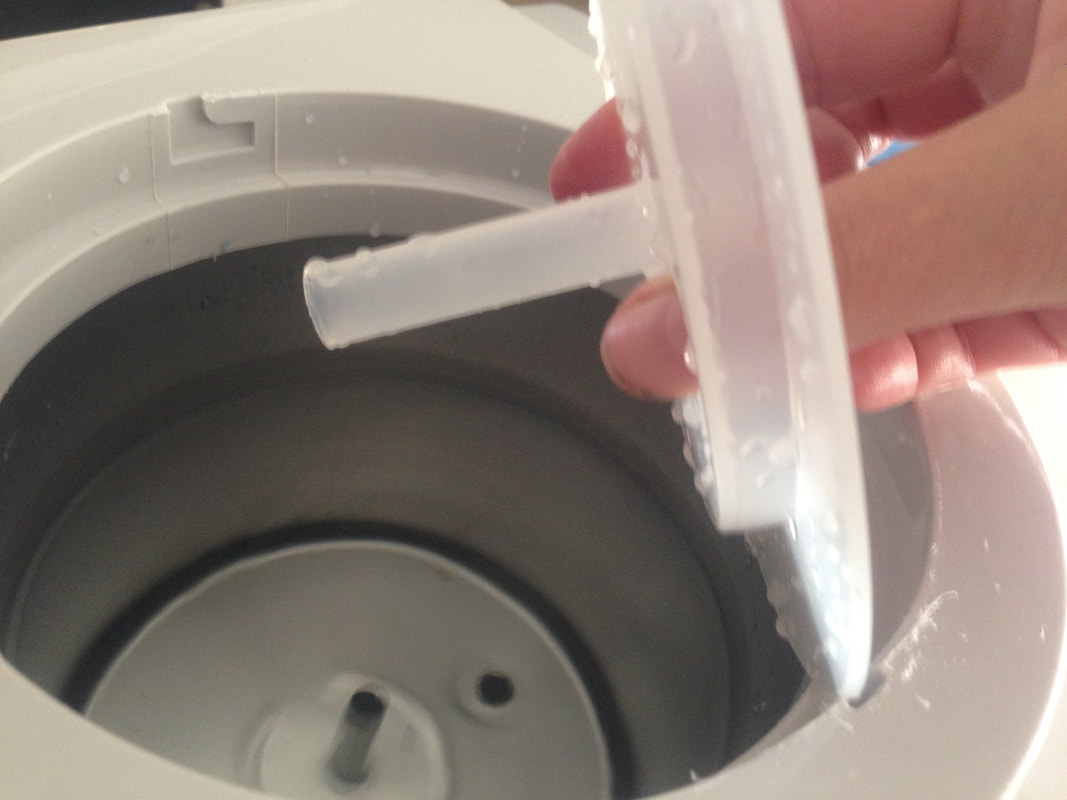
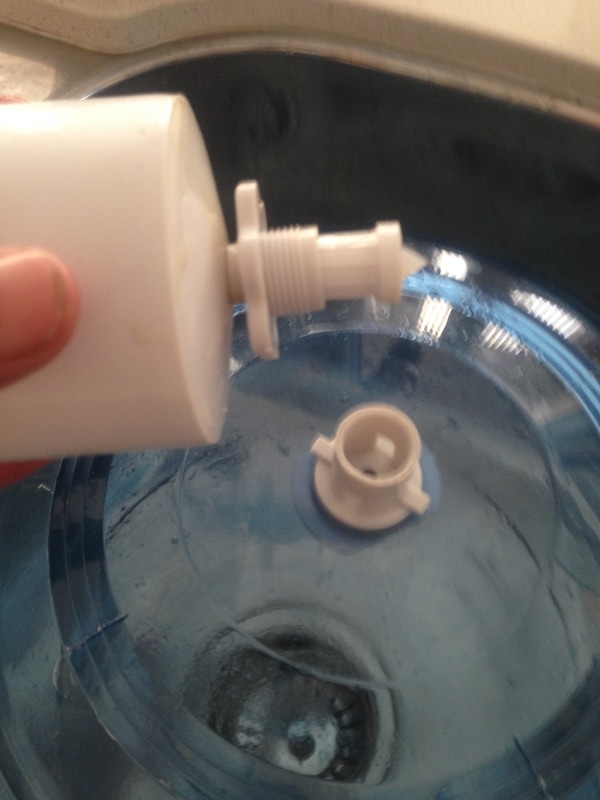
UNSCREW FLOAT VALUE
(THE UPSIDE CUP BOTTOM ON BOTTLE SET)
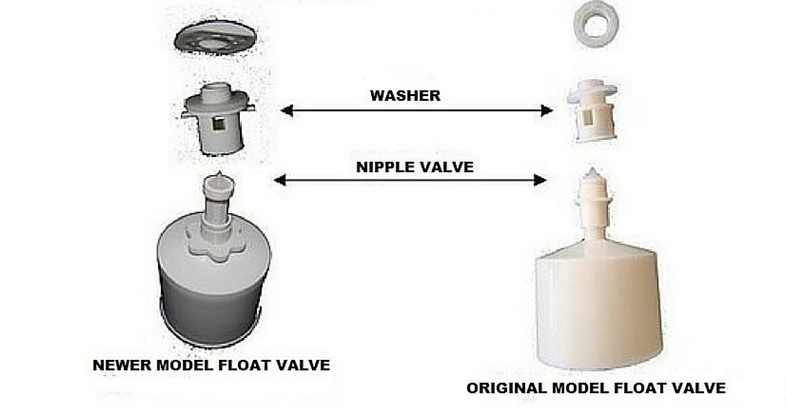
BEIGE IN COLOUR FOR OLDER WATER COOLERS
NEW BPA FREE FLOAT VALUE ARE WHITE
AS IT WILL STILL FLOW WATER THROUGH
EMPTY WATER OUT OF COLD TANK UNTIL WATER LEVEL IS
ABOUT 3 INCHES DOWN
UNSCREW FLOAT VALUE
(THE UPSIDE CUP BOTTOM ON BOTTLE SET)
BEIGE IN COLOUR FOR OLDER WATER COOLERS
NEW BPA FREE FLOAT VALUE ARE WHITE
|
NEW BPA FREE
FLOAT VALUE (WHITE) |
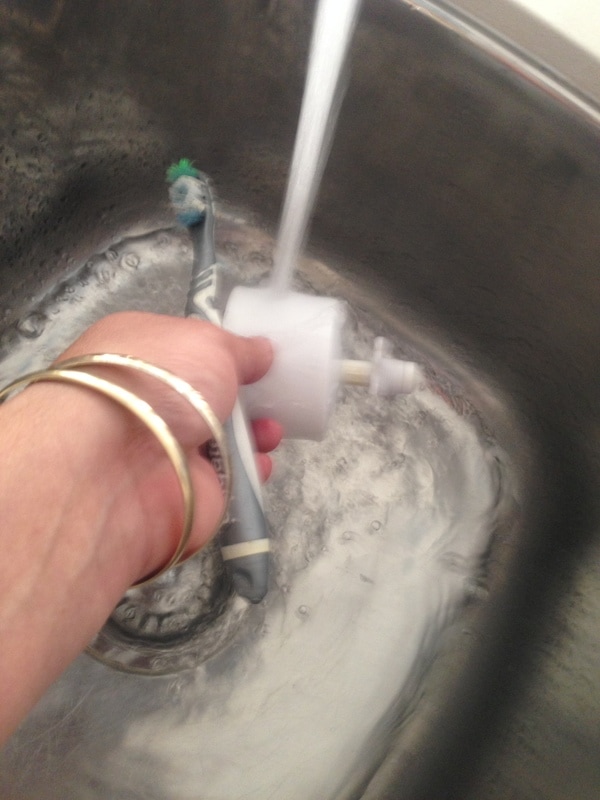
FLOAT VALUE HOW TO CLEANClean the float under running water with
a NEW chux, do not use any soap or detergents. Especially focus on the treads where the two parts screw together. CHECK TO SEE THAT NIPPLE IS LOCATED IN POSITION OTHERWISE THIS MAY CAUSE THE WATER COOLER TO LEAK
|
ORIGINAL
FLOAT VALUE (BEIGE) |
Clean the 2nd part of the float valve,
focusing on the treads
THIS is where calcium often builds up in the threads
thus causing the float
not to lock properly.
focusing on the treads
THIS is where calcium often builds up in the threads
thus causing the float
not to lock properly.
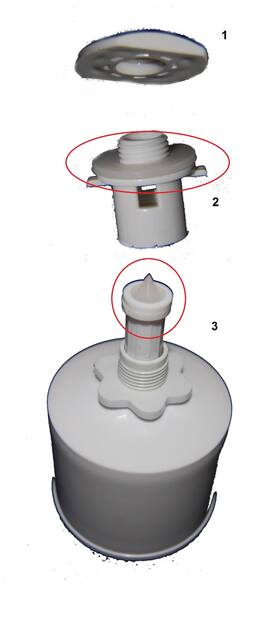
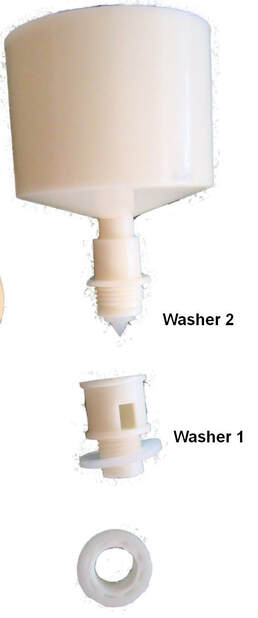
The float valve consist of these 3 parts,
with 2 x washers.
Check to make sure washers are in there correct place.
with 2 x washers.
Check to make sure washers are in there correct place.
UNSCREW FLOAT VALUE
ALL PARTS CAN BE CLEANED WITH A TOOTHBRUSH OR SOFT CLOTH
THE FLOAT VALUE REGULATES THE AMOUNT OF WATER FLOW IN THE TANK
IF THIS DOESN'T WORK PROPERLY THE TANK WILL OVER FLOW
AND LEAKING WILL OCCUR
MAKE SURE WASHER ARE IN THEIR CORRECT POSITION
ALL PARTS CAN BE CLEANED WITH A TOOTHBRUSH OR SOFT CLOTH
THE FLOAT VALUE REGULATES THE AMOUNT OF WATER FLOW IN THE TANK
IF THIS DOESN'T WORK PROPERLY THE TANK WILL OVER FLOW
AND LEAKING WILL OCCUR
MAKE SURE WASHER ARE IN THEIR CORRECT POSITION
PLACE BOTTLE SET BACK ON COOLER FILL AS RECOMMENDED
KEEP A EYE ON BOTTLE SET IF STARTS FILLING UP
FLOAT VALUE SHOULD BE WORKING FINE,
BUT CHECK VIA LIFTING BOTTLE SET
ONCE WATER IN BOTTOM OF BOTTLE SET GOOD INDICATOR.
KEEP A EYE ON BOTTLE SET IF STARTS FILLING UP
FLOAT VALUE SHOULD BE WORKING FINE,
BUT CHECK VIA LIFTING BOTTLE SET
ONCE WATER IN BOTTOM OF BOTTLE SET GOOD INDICATOR.
|
|
|
IF PROBLEM STILL PERSISTS
PURCHASE A NEW FLOAT VALUE
RECOMMEND COLD SIDE SETTING BETWEEN 6-8 DEG
PURCHASE A NEW FLOAT VALUE
RECOMMEND COLD SIDE SETTING BETWEEN 6-8 DEG
BPA FREE FLOAT VALVE + ALK WATER STICK
A$35.00 - A$175.00
OPTIONAL EXTRA FILTERS (1 = $50) (2 = $80) (3 = $110) (4 = $130)
(AWESOME COOLERS REPAIR MANUAL)
These are for our newer bottle sets that have to white lid.
This need to be taken apart every time you replace your awesome water filter.
The job of the float value is to control the amount of water in the cold tank.
IF this is not cleaned on a regular basic, may make the water cooler to leak.
unscrew all parts place in the drip tray fill with water whilst you install you water filter so if has time to soak, clean with a toothbrush and a chux cloth, reassemble and put back into position.
