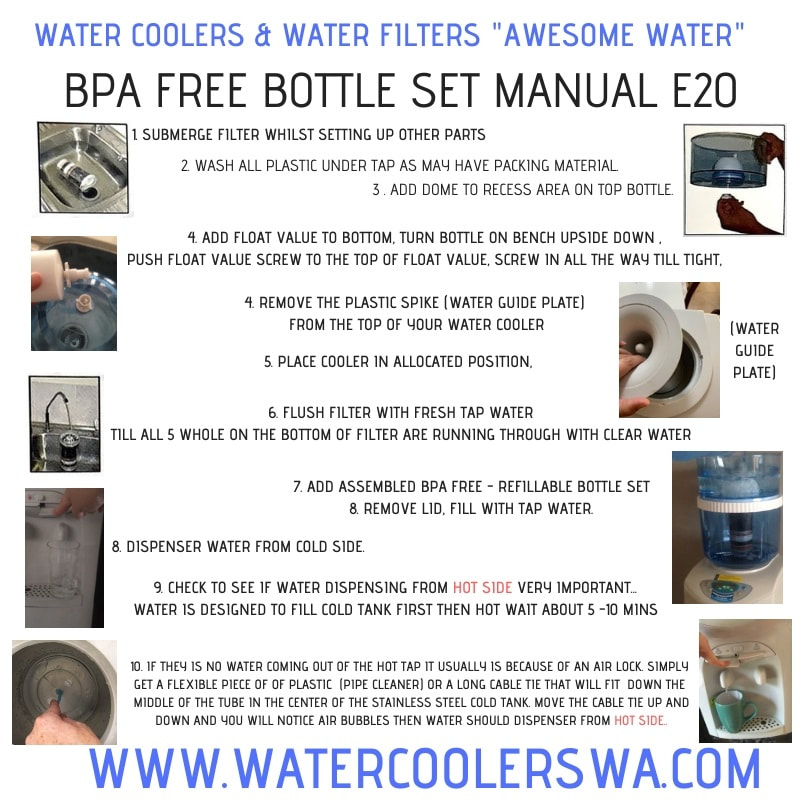
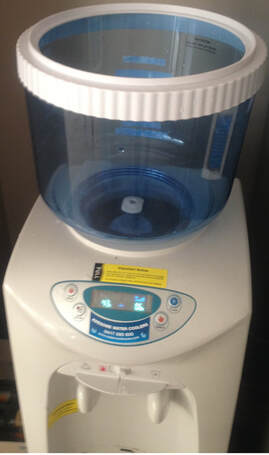
ASSEMBLING YOUR WATER COOLER
| ASSEMBLING YOUR WATER COOLER FEB 2020 |
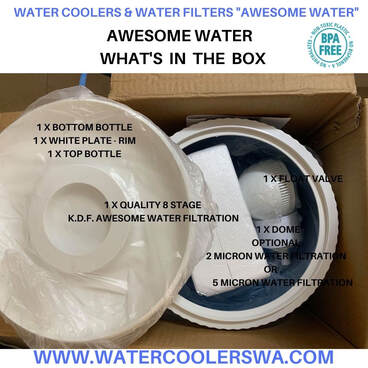
IN THE BOX
|
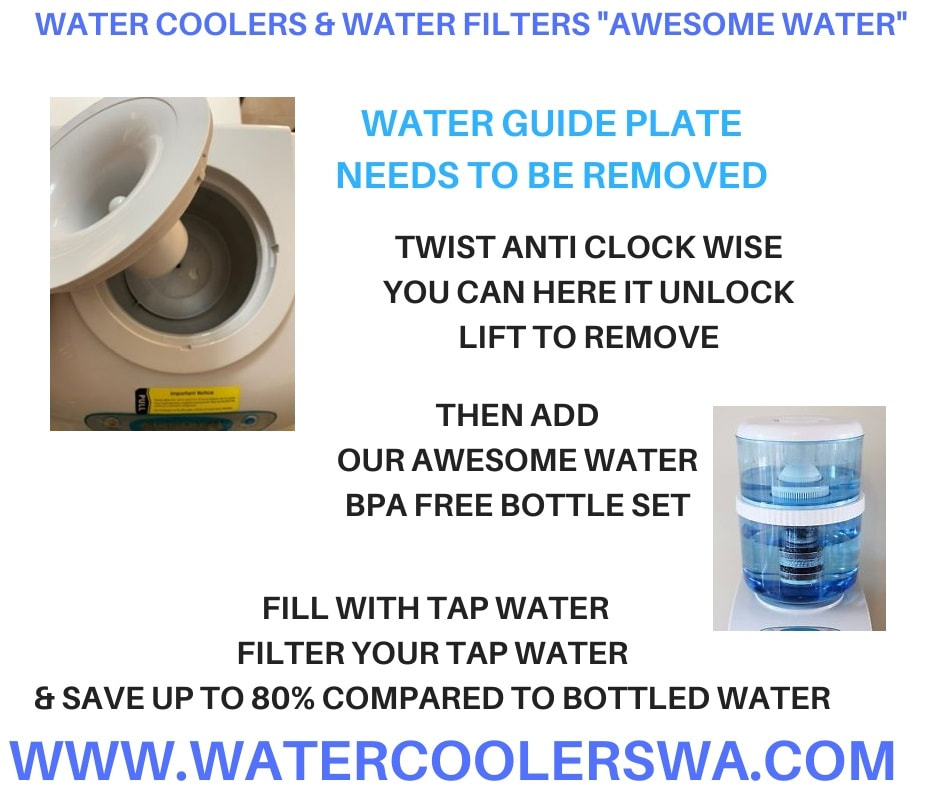
REMOVE WATER GUIDE PLATE TO INSTALL OUR BPA FREE REFILLABLE BOTTLE SETS
|
|
Open box, place water cooler in position,
BEST away from direct sunlight Remove the Dust Cover, twist and pull up 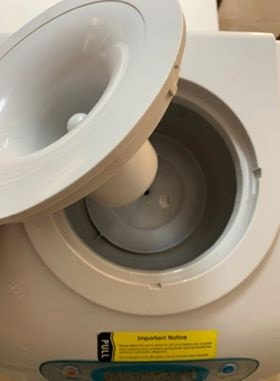
TWIST ANTI CLOCK WISE YOU CAN HERE IT UNLOCK. LIFT UP TO REMOVE
|
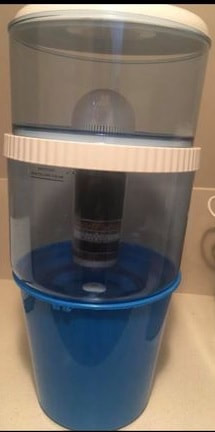
Open box containing the bottle set
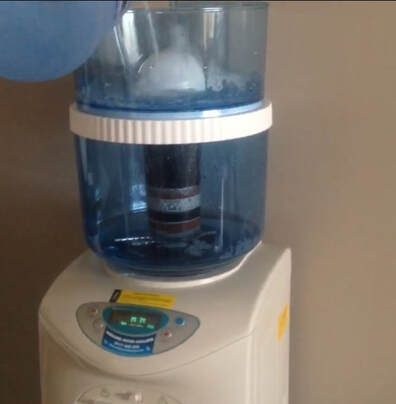
Place filter in jug, fill with water to start the filtration process 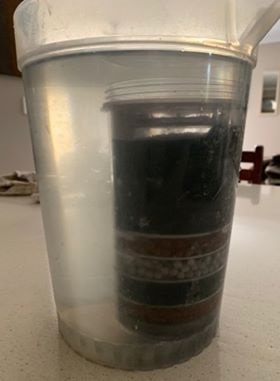
PLACE YOUR FILTER INTO A BUCKET OF WATER TO START THE ACTIVATION OF THE FILTER MEDIA
|
Was all plastic bottle set part thoroughly
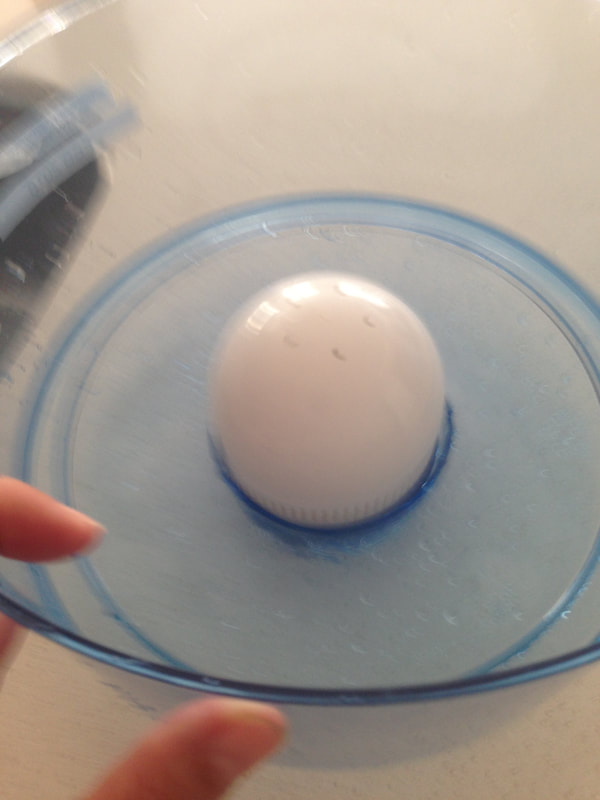
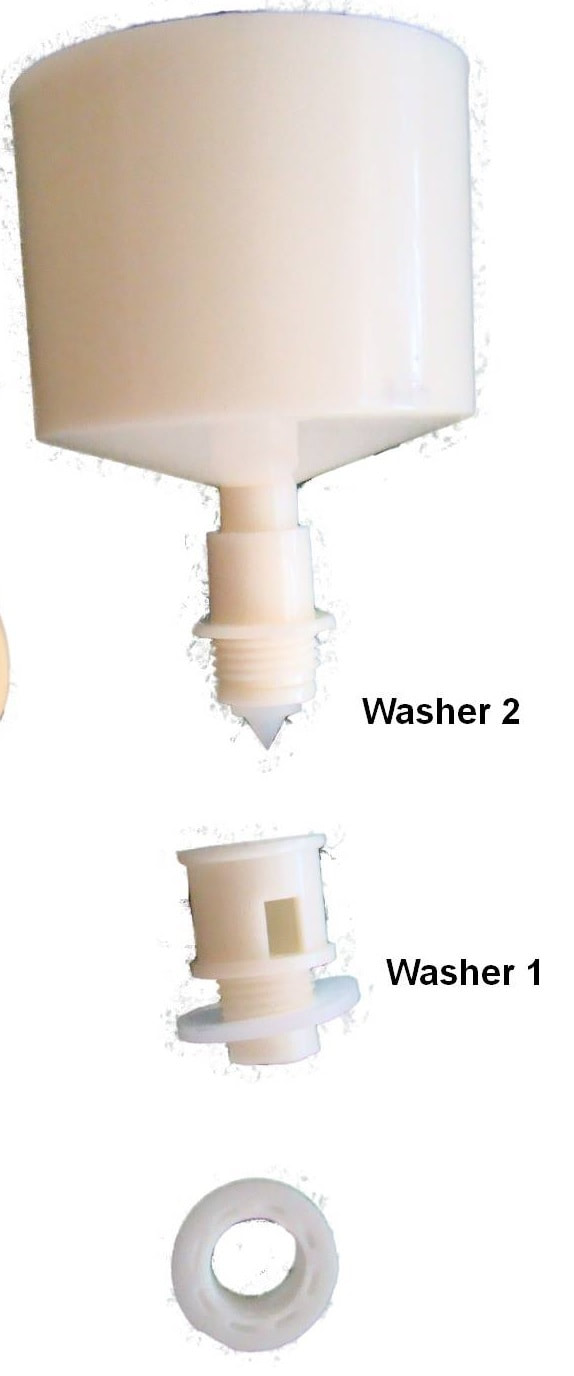
Screw float valve to bottom bowl
Ensure this is tight
Check to make sure float valve moves freely when
Pushing up, it should drop back down into position
Screw float valve to bottom bowl
Ensure this is tight
Check to make sure float valve moves freely when
Pushing up, it should drop back down into position

PLACE BOTTOM BOWL INSIDE THE COLD TANK WITH FLOAT VALUE INSIDE AS PICTURED
Place bottom bowl onto water cooler
cold tank float valve
goes inside cold reservoir
cold tank float valve
goes inside cold reservoir

4 GROOVES ON BOTTOM OF BOTTLE SET ALIGN UP WITH 4 GROOVES ON WATER COOLER AS PICTURED
|
4 GROOVES ON WATER COOLER ALIGN UP WITH 4 GROOVES ON BOTTOM OF BOTTLE SET
|
Position the plastic grid bars, to recessed grooves located on the top of the water cooler above the cold reservoir, give a twist for it to slightly lock into position,
DOME SCREWS TO THE TOP OF BOTTLE SET. SCREW GOES UNDERNEATH
|
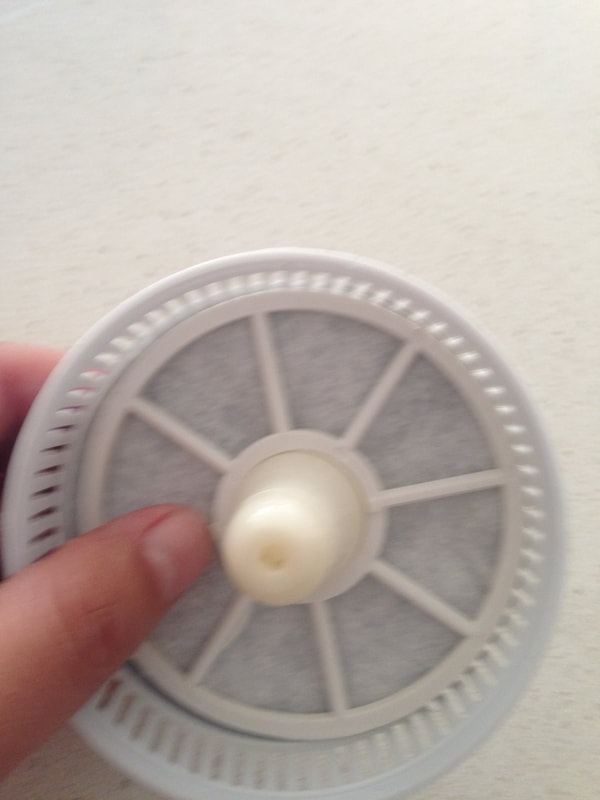
WHITE FELT CLOTH ALWAYS GOES TO THE TOP OF THE CAGE IN DOME
|
Unscrew nut on dome
Check to make sure inside dome
they is a black and white cloth
(white to the top, black underneath)
Place dome in top bottle set
Screw into position.
Check to make sure inside dome
they is a black and white cloth
(white to the top, black underneath)
Place dome in top bottle set
Screw into position.
FLOAT VALVE GOES INSIDE THE COLD TANK TO REGULATE THE FLOW OF WATER AS PICTURED
Place bottom bottle onto your water cooler
Add the white plate 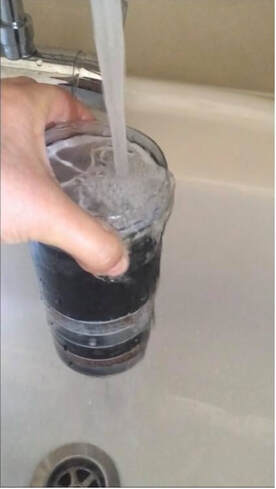
FLUSH YOUR FILTER WITH COLD WATER ONLY TO ACTIVATE FILTRATION PROCESS
IF no flow through filter, use water in jug and pour 1/3 over filter,
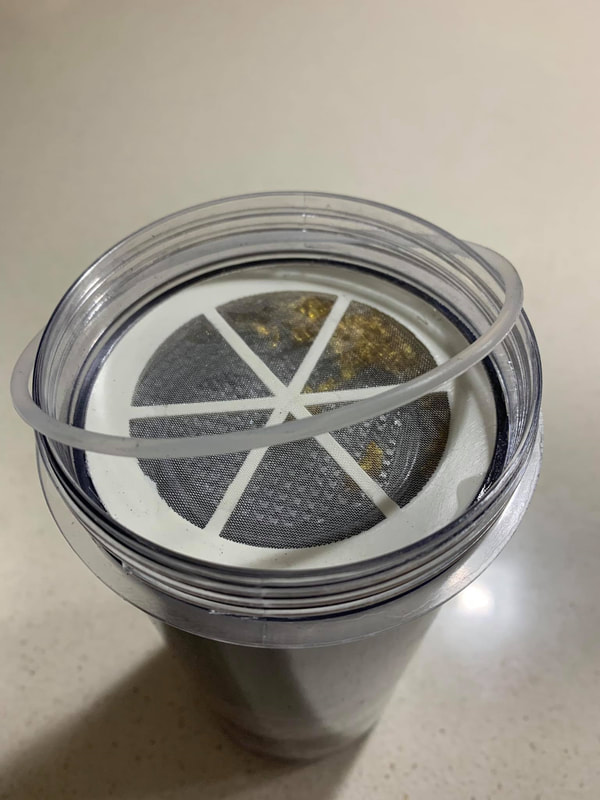
give filter a tap at the top to help loose the filter media, as it can be very tightly compacted. Lift and check the 5 holes again, |
Check filter flow, lift up filter and see
if all 5 holes underneath are flowing freely, IF so screw to the underneath of top bottle set. 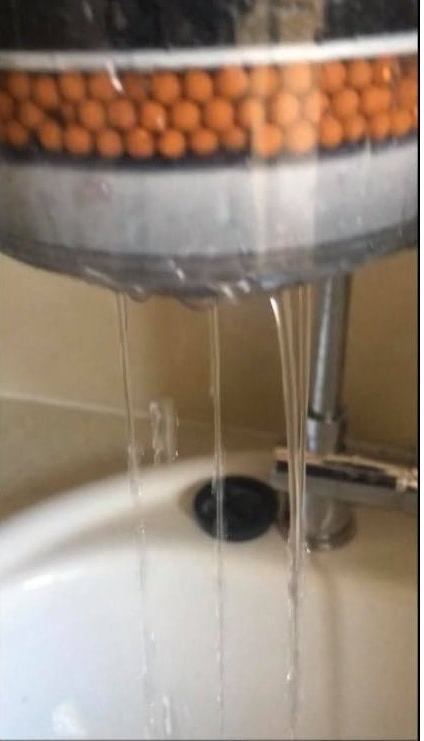
THEY ARE 5 HOLES UNDERNEATH THE FILTER

ONCE YOU HAVE A CONTINUOUS FLOW OF WATER VIA FILTER INSTALL TO BOTTLE SET
IF flowing nicely
add to the underneath of top bottle set, |
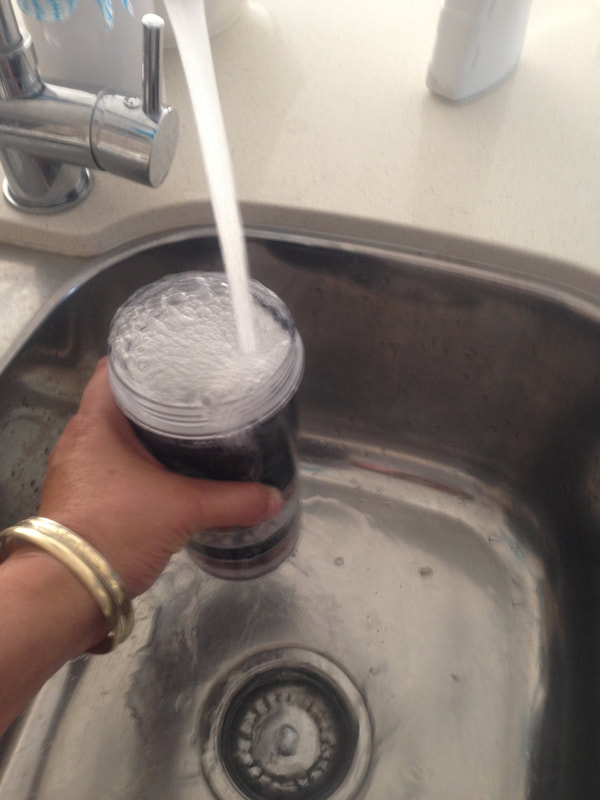
ALWAYS FLUSH YOUR AWESOME WATER FILTER WITH COLD WATER ONLY
IF flow is still slow repeat with the flushing of water from the jug, one or 2 more time until minimum of a 1 hole flowing thoroughly and 2 -3 holes water tricking through.
Add filter to underneath of top bottle set
Add filter to underneath of top bottle set
ALWAYS FILL ABOVE THE DOME. THEY ARE 5 HOLES TO RELEASE BUBBLES
Add top bottle set to white plate and bottom of bottle set,
Fill a bucket full of tap water and pour into the top bottle set to covering the dome,
they should be air bubbles coming out of the dome to release the trapped air.
Fill a bucket full of tap water and pour into the top bottle set to covering the dome,
they should be air bubbles coming out of the dome to release the trapped air.
You can fill to the brim at this stage as water needs to fill the hot pot,
cold tank and bottle set on set up.
LEAVE for 10 minutes for the filtration process to filter most of the water.
cold tank and bottle set on set up.
LEAVE for 10 minutes for the filtration process to filter most of the water.
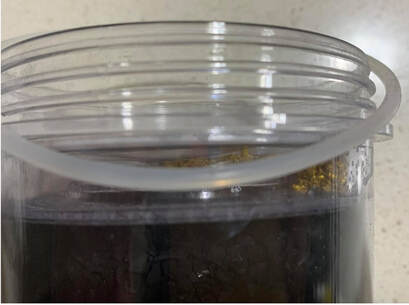
CHECK O -RING IT ALL THE WAY DOWN OFF THE THREAD AND ON THE ALLOCATED EDGE
On the top of filter they is a rubber O – ring
Check to make sure that the O – ring it is at bottom of filter and flat, with no twists etc IF water is dripping via the outside of filter Check O –ring and tighten filter a little more.. |
TOP VIEW OF EDGE WHERE O-RING NEEDS TO SIT FLAT AND ALL THE WAY DOWN
|
Making sure you DO NOT cross thread the filter and threading,
best holding it up and flat whist screwing on filter
best holding it up and flat whist screwing on filter
You can now fill up with tap water.
Only fill until the bottom bowl is full.
Maximum water level line shown on bottom bowl
Only fill until the bottom bowl is full.
Maximum water level line shown on bottom bowl
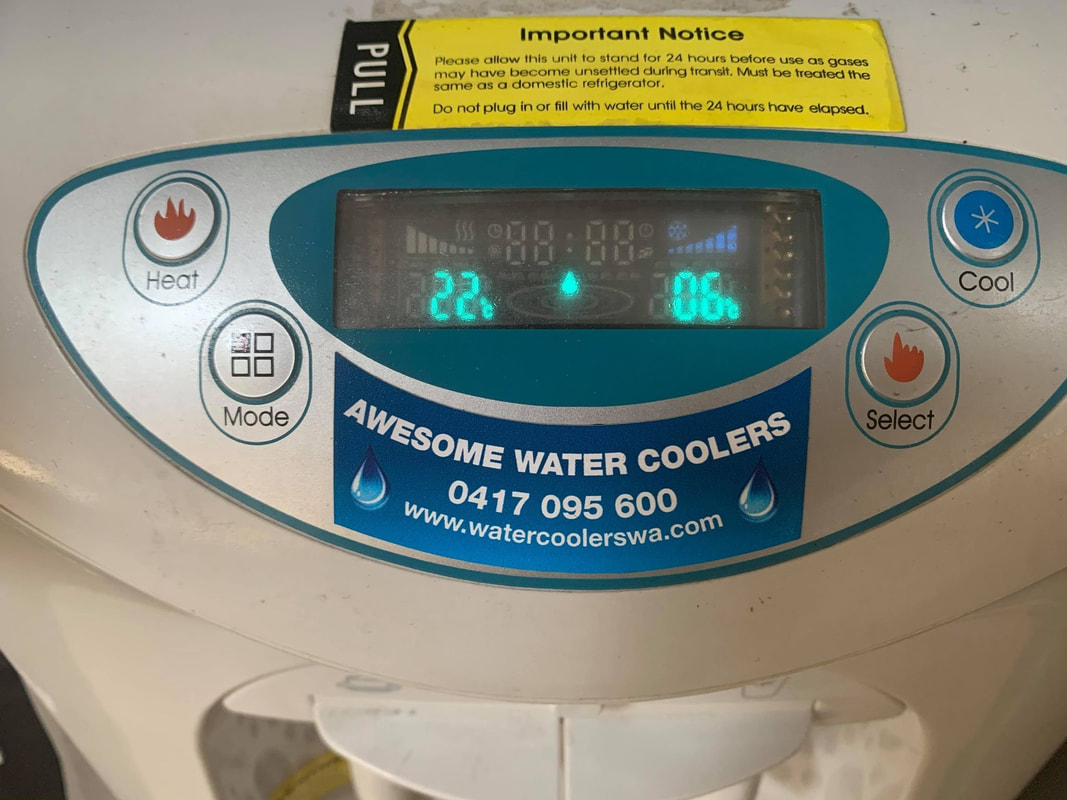
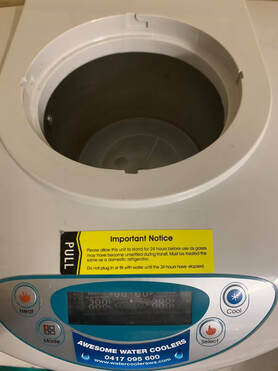
AWESOME WATER DIGITAL SCREEN RECOMMENDED COLD SIDE BETWEEN 6 - 8 DEGREES
Hot & cold models
CHECK they is water coming from the hot tap
before turning on power.
CHECK they is water coming from the hot tap
before turning on power.
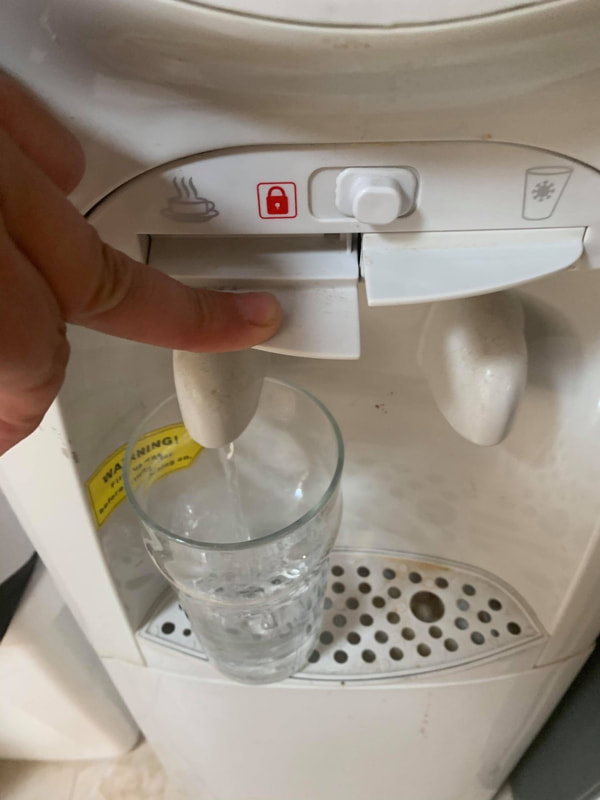
CHECK WATER RUNNING VIA HOT TAP BEFORE TURNING ON
DO NOT boil the kettle – hot pot if not water coming out of hot tap
IF no water dispensing from hot tap
Wait 10 minutes, for water to fill the hot tank,
they are designed to fill the cold tank up first.
IF no water dispensing from hot tap
Wait 10 minutes, for water to fill the hot tank,
they are designed to fill the cold tank up first.
After 10 minutes and still no water via hot taps,
they must be a airlock, follow next steps
they must be a airlock, follow next steps
LIFT UP FLOAT VALVE TO CARRY BOTTLE SET IF IT STILL HAS WATER IN BOTTLE SET
remove the bottle set from water cooler
Place in sink or bucket You can push up the float value to stop the water flow if you need to carry... |
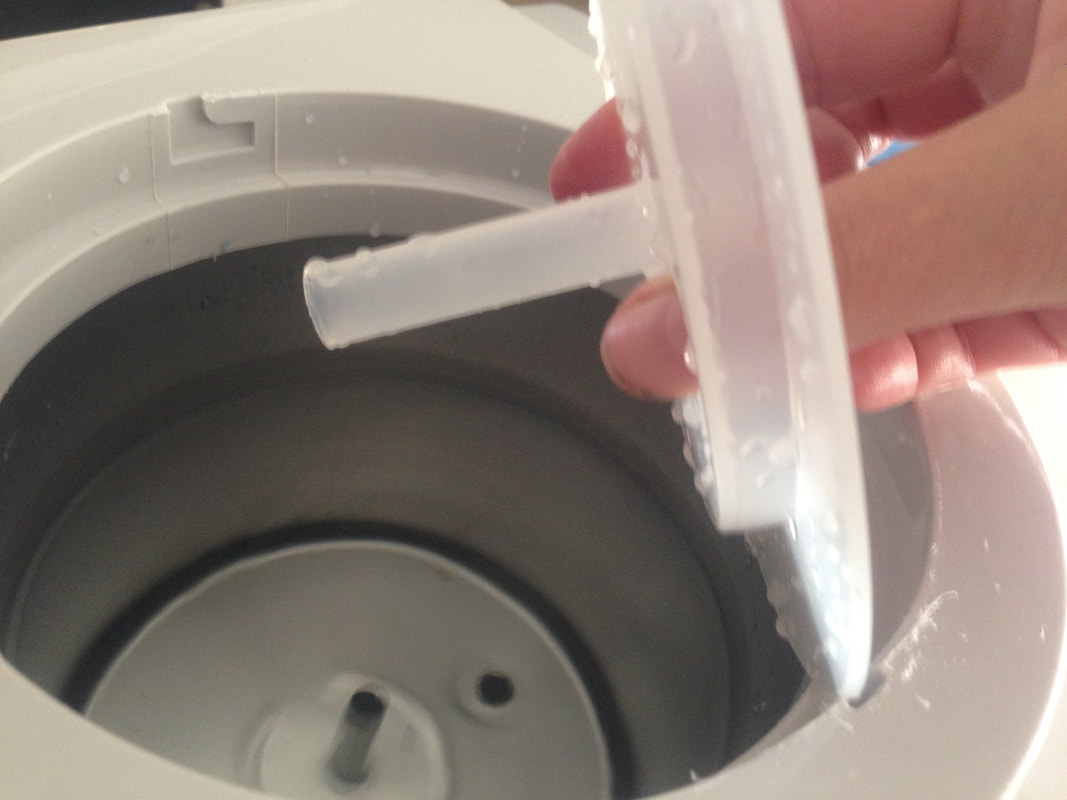
2 HOLES IN SPINDLE FOR THUMB AND FOREFINGER TWIST AND PULL UP
Remove the spindle
(white plastic inside cold tank, give a twist and pull up, they should be air bubbles releasing the air lock now, |

BLUE SNOW FLAKE AND TRIANGLE GRID INDICATED COLD SIDE IS TURNED ON
Check before re assembling, by check the hot tap is dispensing
with the spindle off the spike in the cold tank and bottle set off. IF flowing nicely re- assemble IF still no flow from hot tap, leave 5 minutes, try again Set you’re setting Digital Hot & cold Water Coolers BLUE snowflake ON / OFF Button for compressor |
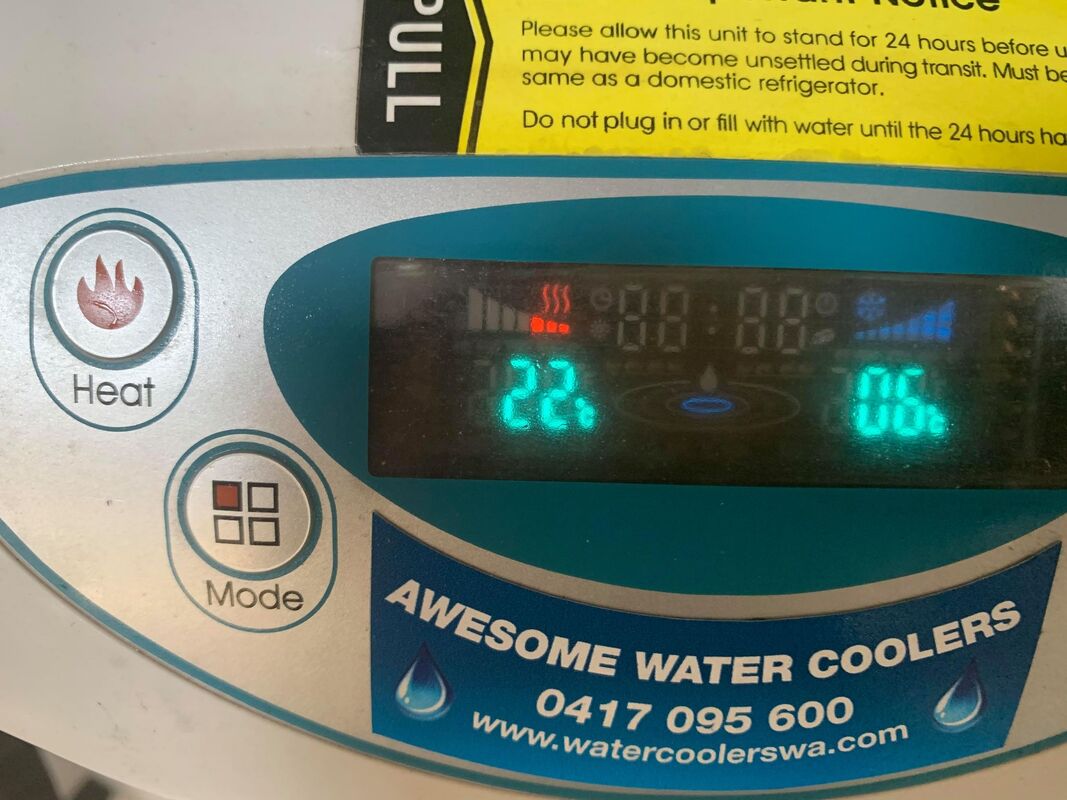
RED STEAM AND TRIANGLE GRID INDICATED HOT SIDE IS TURNED ON
RED Steam ON / OFF Button
for kettle – hot pot On indicator for SELECT – puts machine into it’s settings mode MODE - changes the setting from hot too cold for changing the temperature Press select button Hot temperature will flash |
Use heat button to increase temperature
Use Cool button to decrease temperature
When hot is at required temperature
Press Mode button
Use heat button to increase temperature
Use Cool button to decrease temperature
Use Cool button to decrease temperature
When hot is at required temperature
Press Mode button
Use heat button to increase temperature
Use Cool button to decrease temperature
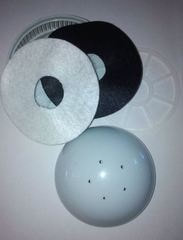
BLACK & WHITE FELT PADS
BLACK GOES TO THE BOTTOM WHITE GOES TO THE TOP
Maintenance for water cooler:
Recommended Black & White cloth to be rinsed thoroughly
through water ONLY regularly (every 2 – 4 weeks best)
Recommended Black & White cloth to be rinsed thoroughly
through water ONLY regularly (every 2 – 4 weeks best)
ORIGINAL BEIGE FLOAT VALVE
|

NEWER BPA FREE WHITE FLOAT VALVE
|
Keep your water cooler to a high level of hygiene,
recommended to rinsed with cold water only and wipe out
your bottle set every 2 months with a new chux
Float valve regulates the water level in the tank.
Recommended to clean bottle set regularly.
They are two sections of the float valve
Unscrew all parts -place in drip tray to avoid losing any parts
Clean thoroughly with a toothbrush and new chux
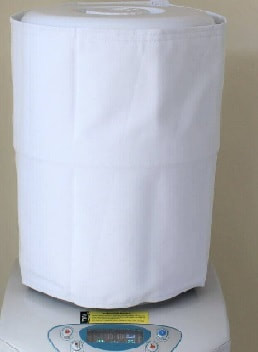
UV COVER
Place your water coolers away from direct sunlight
IF your cooler is in a position where it gets direct sunlight
You might need to clean more regularly.
Or we have UV cover for sale that fits our water cooler bottle sets
Recommended Filter change
every 6 months OR 1000 litres
Whilst your machine is under warranty,
filters need to be replaced every 6